Hazen’s right wing continues its uneven struggle with Granbury’s men. The two lines blaze away at each other at close range. Any brave and intrepid Union soldiers that muster the courage to charge the Confederate lines are shot down within feet of the enemy. This creates a “dead-line” as Ambrose Bierce calls it; a sort of no-man’s land between the lines where psychologically, men eventually refuse to cross.
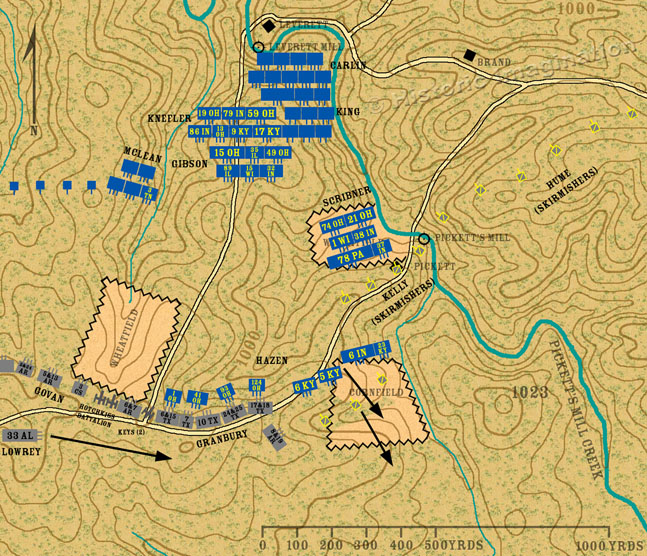
The left wing reaches the edge of a cornfield and pushes across. The field slopes downward into a smaller wooded ravine that cuts the cornfield in half, and then slopes back up again to another smaller ridge. The Union troops push the Confederate skirmishers downward into the ravine and back up to the other side.
To the east, Scribner’s brigade crosses a small wheat field, at the bottom of which is the end of the same ravine Hazen is fighting in. However, Scribner’s men are stopped by the fire from Kelly’s cavalry skirmishers at the top of the ridge, and by fire from Hume’s skirmishers across the creek. The fire from across the creek strikes Scribner’s men in the flank. Either these skirmishers are made of sterner mettle than those who fell back before Hazen’s second line, or Scribner’s men do not press the advantage a line of battle has over a thin line of skirmishers.
To the west, the 8th & 9th Arkansas regiment forms facing east, and Lowrey's Brigade arrives and beings running toward the cornfield.. |